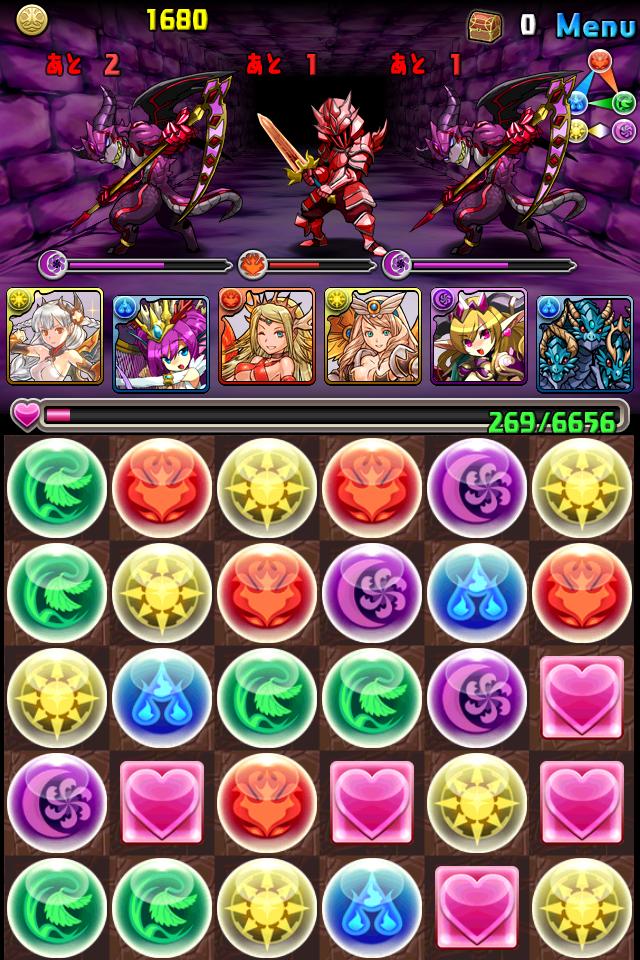
And as of 12/15/2012 10AM PST, Hera Descended event has approached the first time. And there's only one difficulty. This is not like a normal dungeon where you can just go all in with your best Dark Team and try sweeping. Because you cannot sweep them.
In general, Hera Descended is a dungeon that encounters 4 rounds of really strong minions and 6 rounds of 1-on-1 God bosses, as follows:
----------
Round 1~4 (ATK, TURN, HP, DEF)
Mystic Flame Knight 6480, 3 76350, 900
Pyro Devil 3480, 1, 19050, 1400
Pyro Demon 5460, 2, 46650, 2200
Mystic Ice Knight 6540, 3, 76350, 900
Frost Devil 2400, 1, 19200, 1400
Frost Demon 5490, 2, 48150, 2200
Mystic Stone Knight 6630, 3, 76350, 900
Tavy Devil 2430, 1, 19350, 1400
Tavy Demon 5670, 2, 49650, 2200
Mystic Light Knight 6660, 3, 76350, 900
Harpie Devil 2520, 1, 19650, 1400
Harpie Demon 5550, 2, 51150, 2200
Mystic Dark Knight 6720, 3, 76350, 900
Blood Devil 3400 1, 19800, 1400
Blood Demon 5580, 2, ~19500, 2200
Minibosses:
Venus (Round 5)
5647, 1, 429489, 1200
Minerva (Round 6) 14117, 3, 515044, 1200
Ceres (Round 7) 10780, 2, 515044, 1200
Neptune (Round 8) 18480, 4, 44489,
72000
Hades (Round 9)
82133, 6, 600600, 1200
Boss:
Hera (Round 10)
12354, 1, 2569319, 372
Looking at the data itself (the red bold numbers), doesn't it look impossible? Well, that's why this guide is here! I will talk about two to three possible strategies. Please understand that these strategies are not 100% guarantee to beat the dungeon. Master-level skills like charging skills per round and saving up gems are a must-know to help you advance further and beat this dungeon.
----------
General Strategy: Learn to Calculate Which Monsters Attack in the Same Turn
Remember: Knights 3 Demon 2 and Devil 1.
If you see a Devil, you will have to always kill it first.
Example 1: Demon 2 Devil 1 - next turn they will both attack in the same turn. Kill Devil first.
Example 2: Knight 3 Demon 2 - after the Demon attack twice, they will both attack the same turn (within 4 turns). Kill Demon first.
Example 3: Demon 2 Demon 1 - sometimes monsters spawn with an attack turn not the same as their cool down turn. In this special case, you don't have to worry because these two demons will always attack alternatively.
----------
Strategy #1: Valkyrie Team
Great Valkyrie (Leader)
Siren the Enchantress (max skill preferred)
Echidna (5 star preferred)
Another Siren the Enchantress (if your first one is not max skilled) / Echidna (if your one Siren is max skilled)
Any Healer (Another Siren or Echidna preferred)
Lilith (4 or 5-star both fine)
Viper Orochi
Valkyrie Team is to make use of the medium-high damage on minions; its high recovery and a resolver (Viper Orochi preferred) to survive most of the hits from bosses.
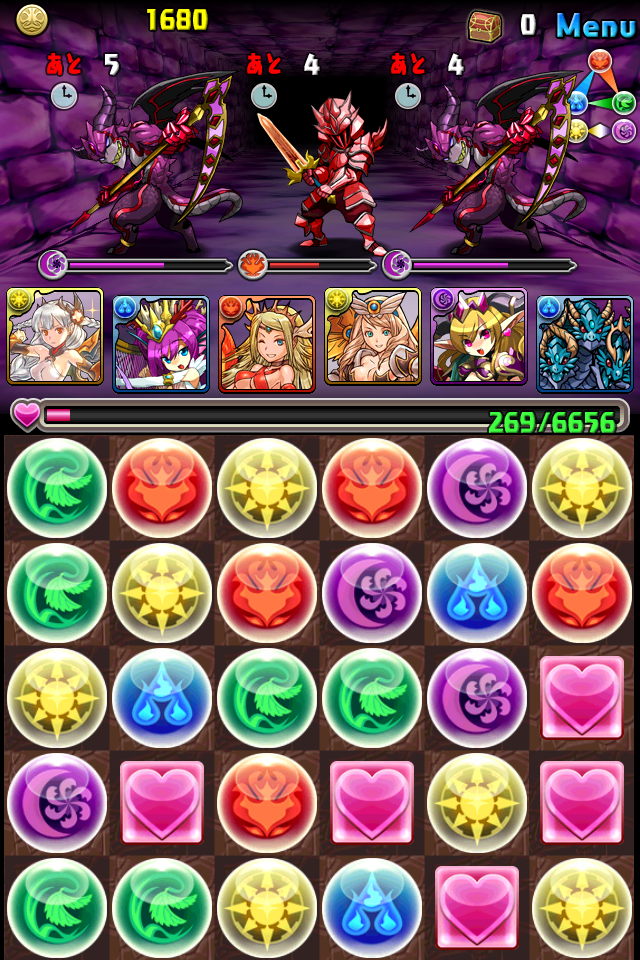
Round 1: Two monsters. Whatever they are,
they cannot attack the same turn. you MUST kill one first and leave the other to apply Resolve. You might be able to take one hit. Afterwards you will have to heal up to a certain amount of HP (50% for Orochi, and 70% for Ogre). But no matter what, you want to avoid any monsters that attack the same turn.
Make sure you charge up skills before killing that only one.
Round 2-4: Gets tricky. Mostly 4 monsters.
Again, you MUST kill the monsters that attack the same turn. If you cannot, always do combos that can kill until one left. Last resort, you will always have Echidna or Orochi to delay their turns.
Round 5: Venus attack per turn.
You MUST heal every turn. So make sure you have a strategic way of saving up some Heart Gems. And did I mention your Siren has to be max skilled?
Round 6-7 Minerva and Ceres are straightforward. Just attack and heal.
Round 8 Neptune has 72000 DEF. You have to use Lilith. Just keep healing. Don't bother with dealing damage. It will take around 10 minutes until the poison gets into his brain.
Round 9 Hades. Attack and Heal.
Round 10: similar to Venus' strategy but way harder because of her HP. You MUST heal every turn. And again this time, it will take more than 20 minutes to battle her. Make sure you save up Heart Gems again.
If you are careful enough, you should be able to beat Hera with no magic stones used :)
----------
Strategy #2: Classic Zombie Team
Siren / Amaterasu
Harpie Demon (max level)
Harpie Demon (max level) (and yes, two of them)
Verche / Echidna
Lilith (4 or 5-star both fine)
Viper Orochi
The low HP of Harpie Demon allows you to not heal manually and focus on attacking. Make sure your 50% of HP does not exceed how much your Healer recovers. For example, my Siren heals 1600 per turn. So including my friend's Viper Orochi, your total HP must not exceed 3200. Otherwise you will have to manual heal and that defeats the whole purpose of the Zombie Team.
Round 1: Two monsters. Whatever they are,
they cannot attack the same turn. you MUST kill one first and leave the other to apply Resolve. This team most likely will get you killed if you encountered two Demons but not Devils. There are tons of luck involved. Combo combo combo with light and try to kill one of them. The rest depends on luck.
Make sure you charge up skills before killing that only one.
Round 2-4: Gets tricky. Mostly 4 monsters.
Again, you MUST kill the monsters that attack the same turn. UseHarpie Demon's skill to help out with some damages and kill the monsters with the same attack turns.
Round 5-10: Since you have a zombie team, there's no way you can die from these stages. The only stage you have to watch out is stage 8, which you have to use poison to kill Neptune.
If you have to use 1~3 stones to pass, do it. Make sure you guarantee yourself that you can pass it with those stones you used up on though. It is better than using 5 stones for a duplicate rare egg. 3 Stones for a Hera? Why not?
----------
And the long story begins...
 |
| No matter what, attack Devils or Demons first. |
 |
| Leave one and charge up skill... |
 |
| In this situation, two Demons will attack alternatively. But... |
 |
| The knight will eventually attack in the same turn! |
 |
| I choose you! Echidna! |
 |
| Same idea. Looks like the Knight will attack in the same turn as Frost Demon. |
 |
| I choose you! Orochi! |
 |
| This is the most challenging one. |
 |
| As long as you sweep the devils. The knights in this case will never attack in the same turnn. |
 |
| And don't forget to charge up all your skills!!! |
 |
| Round 5: Venus! Keep your hearts filled! She attacks every turn! |
 |
| Round 6: Ceres! Attack and Heal! |
 |
| Round 7: Minerva! Attack and Heal! |
 |
| Round 8: Neptune! Nothing else can damage him except for poison... |
 |
| Round 9: Hades! With Orochi, you are nothing! Go back to where you belong! |
 |
| And... the boss... |
 |
| Goddess of Darkness: Hera |
 |
The hardest part is always keeping your Heart Gems filled.
If you don't, its pretty much game over... |
 |
| And the final blow... Great Valkyrie vs Hera! |
 |
| Surrender! And Capture! Gold Egg+! w00tw00t! |
----------
Plan:
Weekend - Weekend Dungeon, getting some coins. I'm expecting some new events... gotta prep up.
Monday - Saving up some Pengdras. Going for Technical Dungeon!


